Gotta start off by apologizing first, this write up was a long time coming. It's probably a few months overdue as I have been driving around with this setup for quite some time now. I haven't even visited the board in a few months now since today, so I may even be behind the power curve here. Jus wanted to finally get this up and out on the forums. Anyway, not much has changed so feel free to hit me up or Richard from Aquamist for any questions.
Well, many thanks first off to Richard from Aquamist for the assist on all the questions I had while doing this project. What you see here is an integration of the Aquamist DDS3 flow monitoring system with the SMC progressively controlled methanol injection kit. First, let me jump to the end and say that this is what every methanol kit needs! Almost every (of course, you can never say never) part of this methanol kit is fool-proof and safe. The DDS3 has the ability to detect too much flow (a leak or broken line) or not enough flow (a clogged line or simply out of meth) both are user tunable to specific sensitivities. One interesting aspect of this kit is that the flow sensor itself has a 0-5V output that can be used in conjunction with any aftermarket management system that has an analog input. With this, you can conceivably control the fuel setup and safety cutouts thru the EMS. I am currently using the XEDE with SMART, so unfortunately, I was unable to employ this additional method of attaining safety as the XEDE currently has no analog inputs left open. It is being utilized by the wideband O2 sensor to control the SMART features of the XEDE. But I feel that with the safety features already in place, the engine is pretty well protected.
Currently I have the methanol to begin injection at 15psi with full spray at 21psi (I am currently tuned to 25psi by Shiv) with my map dialed in accordingly. If the DDS3 senses any problems in the system, i.e. loss of flow, out of meth, etc, then the factory boost solenoid that is wired inline will be cut to wastegate pressure (factory at 12-13psi). So even when running my race map, which doesn't get aggressive until the meth kicks in at 15psi, it will never get there if the methanol flow is abnormal for any reason.
Bottom line...I love this setup and even though I'm sure the SMC kit (along with others without safety features) is proven, it is definitely a peace-of- mind item. I am showing some of the steps I took to install the kit into my car. Some fittings had to be customized because of Aquamist's use of BSPT and the SMC kit utilizing NPT fittings. With some creative thinking, I am certain this setup could be used with almost any methanol kit on the market. Richard is an excellent resource and was with me the entire way. Just to let ya know, my install had some slight variations after I took the pics, so some of these pics will be inaccurate, but nothing relating to how the system performed.

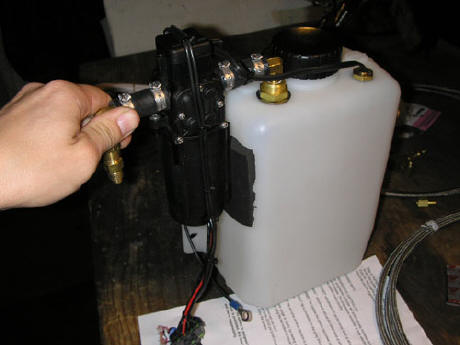
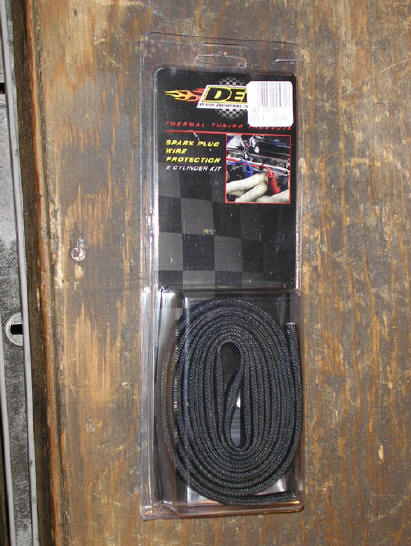
The SMC kit as purchased from No Limit Motorsports

The Aquamist DDS3 kit
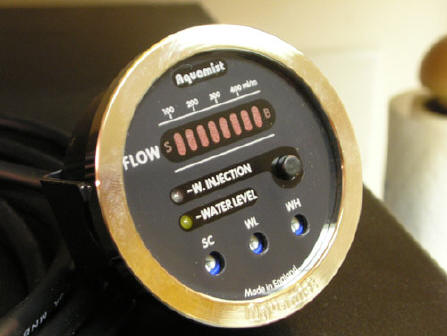
This is what you will interface with as the driver, a nice monitor that fits in any 52mm gauge pod

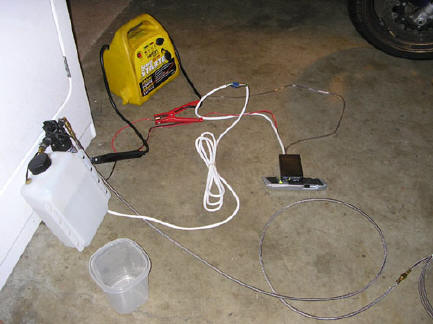
I started out by doing a dry run of the SMC kit on my garage floor. Just to make sure everything worked fine before getting installed. I used tap water for this test run.

I used a 12V jump-pack to simulate a power source from the car. It's hard to see but the red light for low methanol is on, there was no water in the tank.
Here you see some water in the tank and no more red light...float switch works...check!
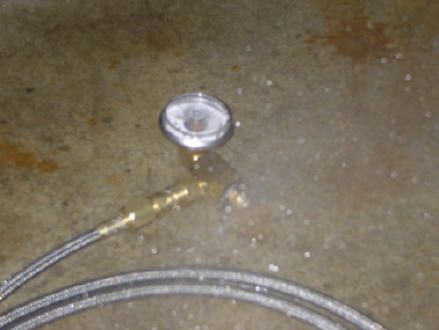
A pic of the nozzle spraying
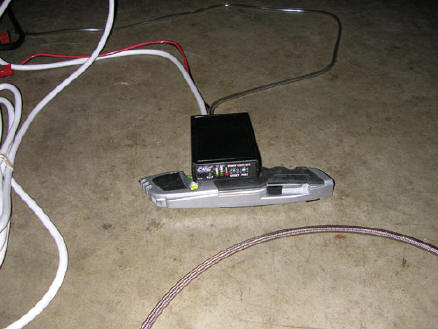
Another pic of the controller

Here is where I decided install the DDS3 flow sensor. The SMC kit comes with 2 lengths of braided steel line to go from the tank in the trunk to the nozzle in the intercooler pipe...a perfect place to put a flow meter inline!

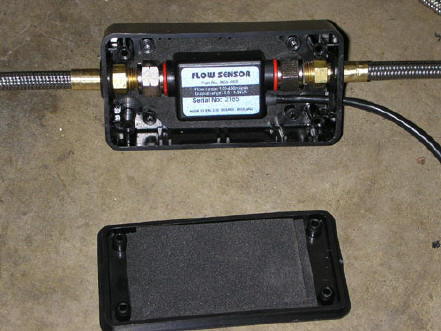
Just taken apart
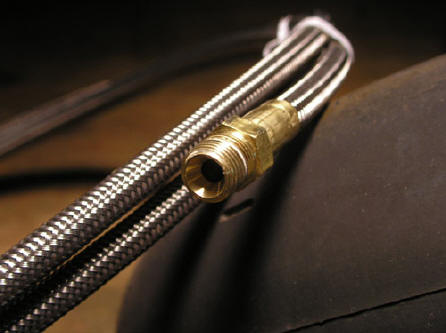
Here are the ends of the junction. I was kind of intrigued as to why the SMC kit has flare fittings on the ends that connect to the tank and the nozzle, but just standard 1/8 NPT fittings for this center junction. Not really bad, but I would have used flare fittings. No worries, as Richard came thru with some adapters to the 1/8 BSPT of the flow sensor
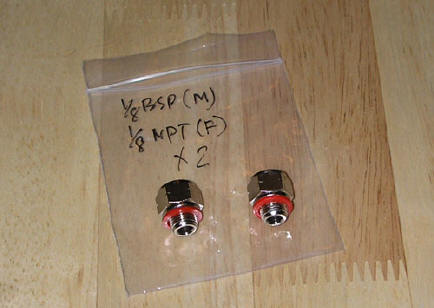
The adapters...keep in mind that getting the right ones are critical. I probably wouldn't go to a local hardware store and jamb something in there. These adapters aren't very common so you might be tempted to just make something work. However, the flow snesor body is plastic with plastic threads and it can be damaged very easily. Just do the right thing and get whatever adapter you need from Richard. He has the ability to pretty much make whatever you need, so whatever kit you integrate this with, be sure to vocalize to him exactly what you need and he'll hook you up...you'll be glad you did.
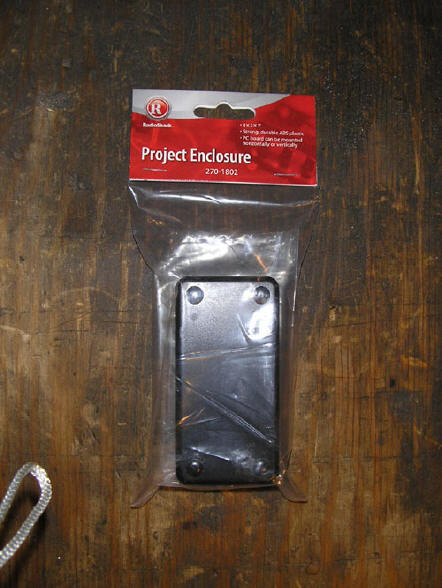
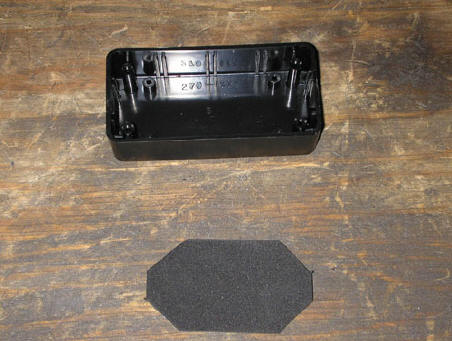
The next few pics are of some parts I used for the flow sensor. Now...this is a step that I totally decided to do on my own and is not really "necessary". My thought process was...this flow sensor will be underneath the vehicle exposed to the elements, so why have it in the line of fire? I got pretty creative and got parts from various places, mostly Radioshack to design an enclosure that would protect the flow sensor. Above is the actual case
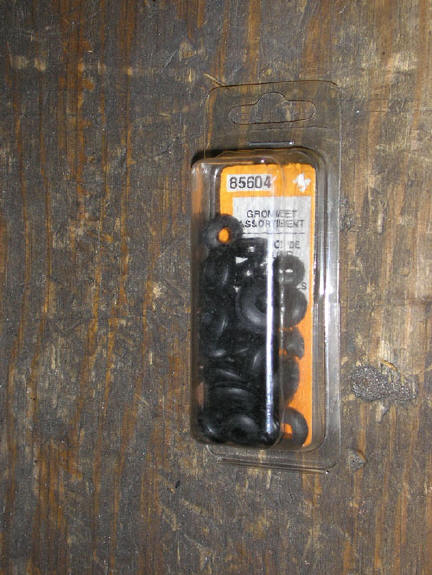
Some random grommets I bought for various duties, in this case, I used some for the enclosure to get a good seal around the steel line exiting the enclosure

This is a grommet around the flow sensors 4-wire wire harness that also has to exit the project enclosure

Some foam padding I bought at the Wal-Mart arts-n-crafts section for about 78 cents a sheet. It has sticky back so you can stick it anywhere. I have used this stuff in so many different projects for my various cars and bikes...very handy stuff to protect against minor scuffing and the like...


All the above pics show the enclosure with the foam padding inside. I had to install some padding then place the sensor inside the enclosure to see if it was a nice fit. Notice on the lid of the enclosure I used 2 layers. This made it so that the sensor was completely still and didn't vibrate while inside
The first hole and grommet for the 4-wire wire harness
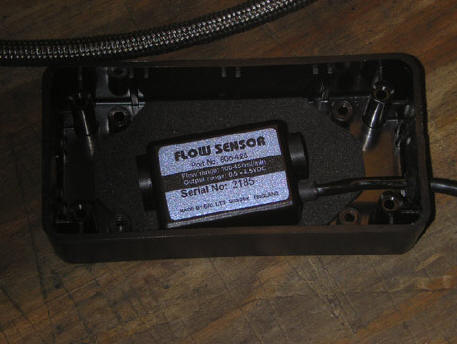
The flow sensor actually in the enclosure with the wire part done

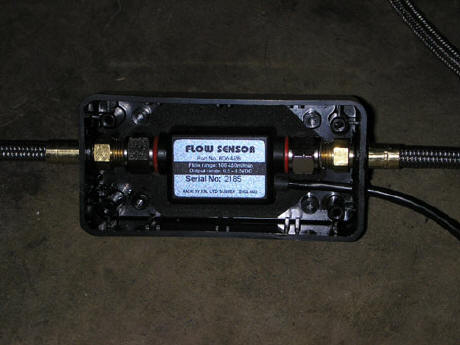
Installed the adapters and beginning test fitting of the steel lines and where to drill the next set of holes for those lines coming into and out of the box
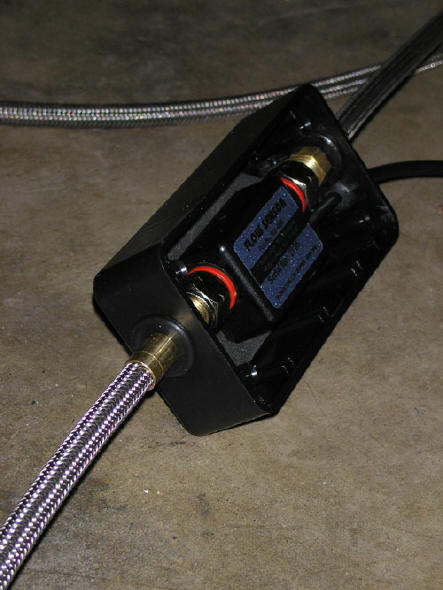

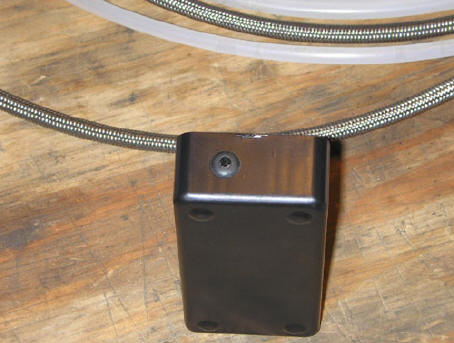
Above are the pics of the enclosure completed. Keep in mind, when you finally installed this thing in the system, there is no distinction which way the methanol flows, so it doesn't matter how you installed it. It will measure flow correctly in either direction

Closed up and sealed up. At this point the enclosure is exactly midway between the 2 lengths of steel line
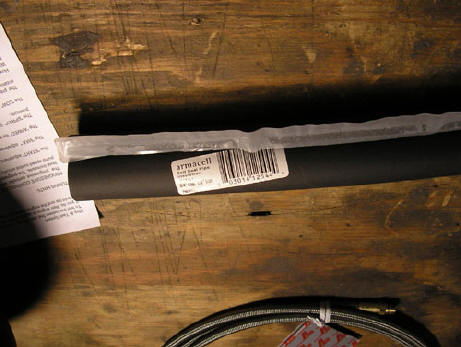
Now, onto something else I wanted to do. My goal here was to minimize any vibration from the pump while it was running or even while it was sitting in the vehicle due to normal driving conditions. Another thing I noticed about the SMC kit was that the pump kinda seems to flop around against the sides of the tank due to it not being secured to anything other than a short section of rubber hose. I know I'm being extra picky here but I like to look very far down the road and take into account any possibilities. I needed to acquire some foam padding that was about 1/2" in thickness. The above mentioned wal-mart stuff wouldn't cut it here, too thin. I know there are other places that you can source this from, but the only thing I could find locally in the correct thickness and "sponginess" was some foam pipe insulation I got from Home Depot. Seeing as I only needed a very small piece, I could make this work
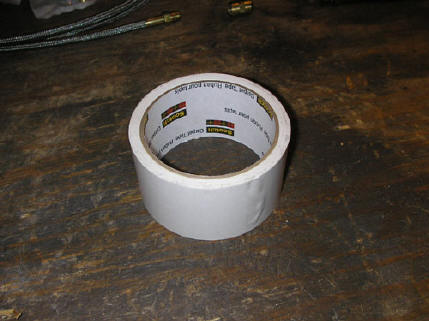
Some double sided tape to stick it to the tank

Here is where I placed it...
Installed...now it looks crappy in this pic, but I didn't take a pic after I cleaned it up. The edges shape nicely with some sand paper, so I managed to get the edges of the foam to look pretty good with a few strokes of 100grit
Okay...here is a part of the project that actually came AFTER I installed the entire system and later wished I had done it in the beginning. So I will include it in around the right place for you lovely folks. It is so there can be TWO float switches in the tank. Some background on why I did this first...
The SMC kit has a float switch already. The way that SMC has it set up is, once the float gets to about 1/3 tank leftover the red light on the controller lights up to warn you "hey...you need methanol"...It is left entirely up to you to fill the system as once it runs dry, there is no safety feature to protect against an aggressively tuned map running out of methanol. I had originally intended on just using this float and tapping into the signal wire for the DDS3 instead of running a whole other float switch and more wires. Now...the Aquamist system also utililizes a float switch with a different design but ultimately serves the same purpose, HOWEVER, when the DDS3 notices that the float is energized, instead of just warning you like the SMC, it cuts the boost solenoid. This is great, right? Well, not so much...as I originally used the SMC float, the DDS3 would cut me down to wastegate pressure every time I got down to 1/3 tank...effectively making that 1/3 extra methanol useless and required me to fill up that much more often. Not fun after about 3 fill-ups. My only remedy was to installed the second float switch ( which comes with the Aquamist kit, btw) extremely low in the tank. Now, I actually have a warning light AND a boost cutout when it gets to the bottom if I decide to ignore filling my tank when I see the warning light up.
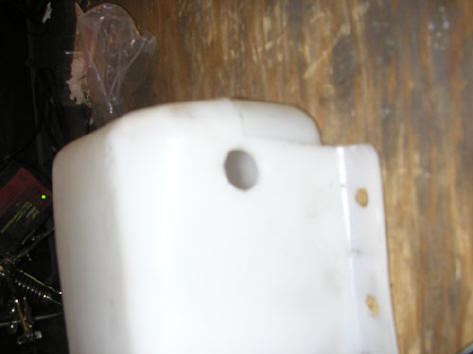
The above pic is of the new hole needed for the Aquamist float switch
Here you see the switch installed and ready to go. It is very low in the tank so that I can get maximum usage of my methanol. You can also get a peek of the cleaned up edges of the foam padding I was talkin about earlier

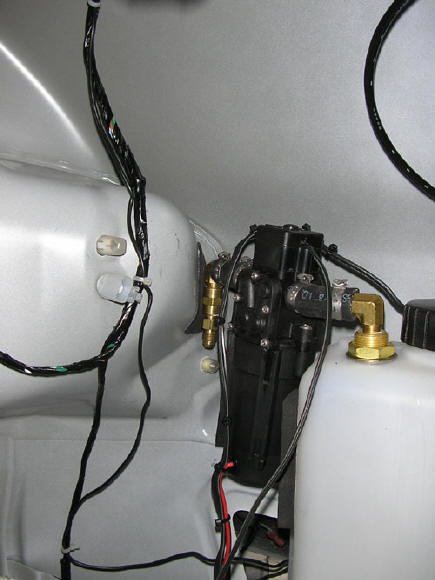
Now onto something else, here is where I decided to put my nozzle. I have the Nisei hard intercooler pipes, btw, so your application may be different. There is much debate on where you should put this thing and I make no claims to know better than anybody else. My common sense just told me to put it after the dump of the BOV and before the temp sensor I have installed in my intercooler lines (which is not currently hooked up, I just have the sensor in there). Plus...the problem with long runs of hard intercooler lines is...you can only get your wrench in so far to turn the lock nut on the inside of the line. Also, notice I just totally uninstalled the SMC pressure gauge as I found it pretty much useless. You can't see it while it's in the car because of where it's at and I really gain no useful info from it, considering I am using the flow sensor which shows my flow rate ( much better to me than psi in this application)

The pipe installed in the car with the nozzle, no steel line hooked up yet. Disregard the clear tubing...not related to this

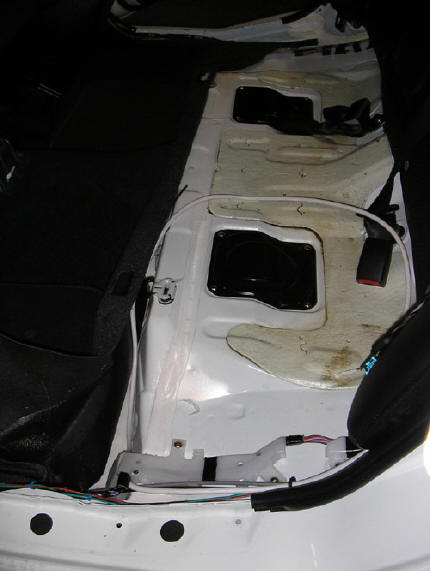
No, onto the trunk mounting of the tank. here the trunk is cleaned out of all the upholstery and ready for the tank
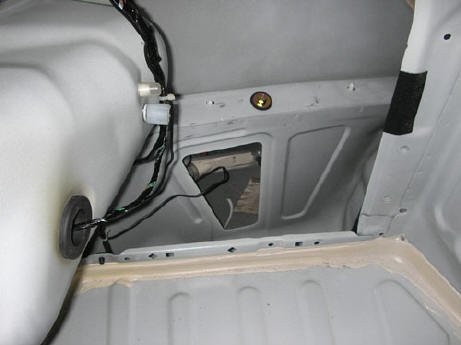
Notice I took out that little black vent thingy to make a little more room for the tank

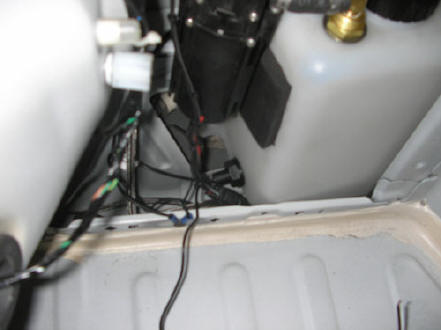
Here is the tank installed in the trunk
If you notice here, the actual location I have then caused this part of the pump output to touch the body of the car. Loose metal to metal is never really good and I did want to keep the chaffing and rubbing to a minimum...sooooooo, another great use of that 78 cent foam paper....

Sanded down part for grounding of the pump

Pump grounded...
Routing of the SMC tank wire harness. I brought in so that it can be brought out of the center console, which is where I put the controller

Here is where the SMC wire harness comes out at
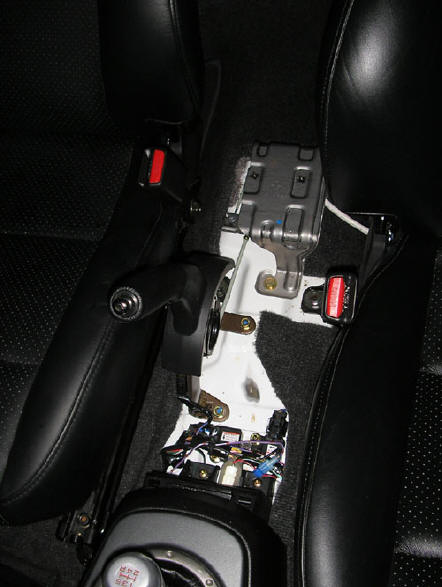
Another angle
Okay...just another shot of some parts I bought to make a clean and safe install...you can never go wrong with wire sheathing...I like this stuff because you can cut it and the ends don't fray or come undone. It's a bit more pricey though. I got it from a custom car shop locally
The SMC wire with the sheathing around it. I used it here because there are some sharp metal edges that MAY cause the wire to get chaffed in the future...

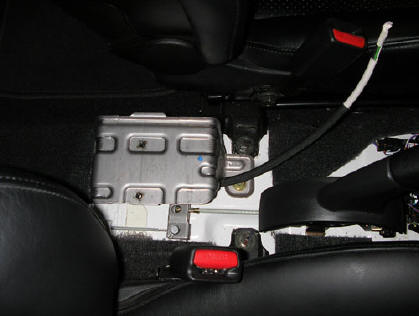
Here is the brain of the Aquamist DDS3 system

The brain opened...
__________________
Oh well, had to do the myspace thing...
http://www.myspace.com/63213968
Stunt biker or just a rider? Check out our website:
www.SBFreaks.com
July 2, 2006...Sac 2 The Bay Ride...don't miss it!