
Some 2 inch Velcro bought at Wal-Mart to place it where it needs to go
...where it needs to go...
Another angle...
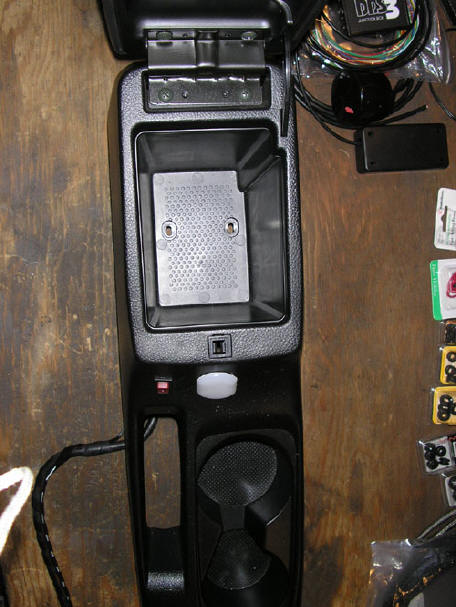
Okay, here is the center console box that will house the SMC controller...

Drilling of a hole to run the controller wires thru...
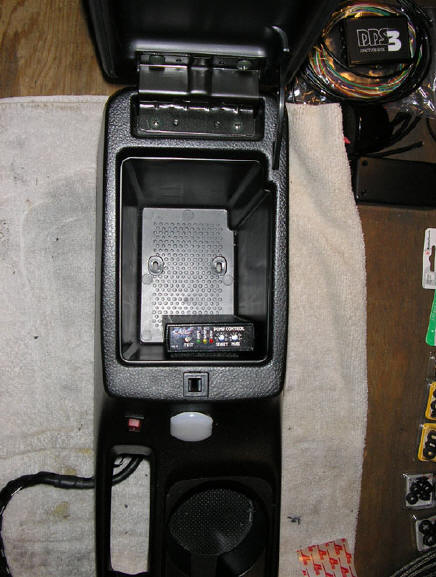
Using more of the Velcro, the final resting place of the SMC controller...

Well, I am a fanatic of clean installs and I love to use disconnects whenever possible to make future maintenance easy. I got everything I needed, to included the crimping tool from here:
http://www.electricalconnection.com...nts/hitachi.htm
Now, I had the crimping tool already because I frequently use these connectors for many other projects, but I still don't think it was too much to come out of pocket
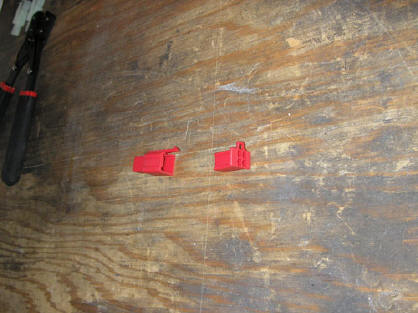
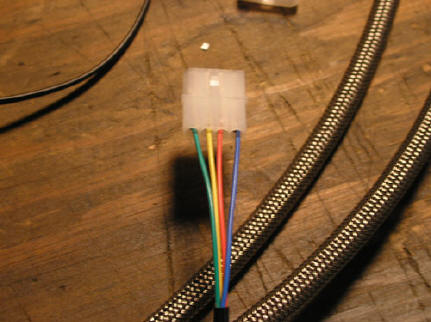
A 4-wire connector

This is the 4-wire end of the SMC wire coming from the controller that will go to the tank/pump

A 2-wire connector

Crimped power and ground wires coming from the controller

Finished install of the power/ground wire coming off the controller

Here is what comes off the end of the controller...the clear tubing is the boost hose that the controller reads from. Just disregard the white connector...
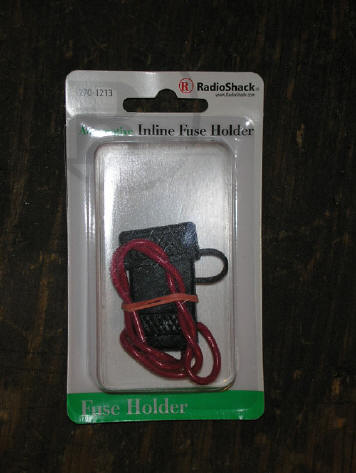
An inline fuse...always a good thing...
Here is the other end of the 4-wire harness going to the tank/pump. Notice the yellow wire. That was the tap into SMC float that I originally used for the Aquamist. It was later delegated to a task that would put an LED onto the gauge pod showing me the warning LED off the SMC controller since the controller always sits in the center console
Finished end...

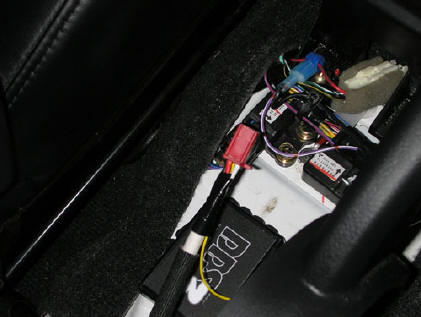
Bringing a power and ground to the center console, then terminating it with a connector. Keep in mind, I put the inline 30A fuse on the power wire which you don't see in this pic
Now, I took this off in order to installed the Aquamist-provided pressure switch which is required for the system to work properly

I drilled a hole here to secure the pressure switch. I was trying to keep everything in the center console but still keep it accessible for maintenance or adjustments ( I was glad I installed it this way later on)

The pressure switch installed...both terminals exposed as well as the set screw...

Installed pressure switch. You can see, I ran a tap off my boost gauge to bring a source of boost pressure to the center console. I then tapped it here too. One going to the other side of the pressure switch and the other going to the controller. Disregard the green wire for now, I will explain later...

Here is everything hooked up. The clear hose goes to the controller

Some single wire connectors I bought at Fry's Electronics. They will be used for making quick connects from the boost solenoid to the DDS3 brain box

The connectors

The connectors installed. I used on side as a female end and one side as a male end which you will see why shortly...
For those of you who have an XEDE, here is that boost wire that had to be pulled out of the ECU harness and reconnected to the XEDE harness

Here it is cut and I put the 2-wire green wire in line. The reason I used opposing male/female ends is...if I ever want to disconnect the system for whatever reason...all I have to do is take the green wire out and connect the brown wire back up to the original green wire
The green wire is from the boost solenoid. Since it took me some time to install this kit and I had to use the car daily, I just brought the wires into the center console, but tapped them together for the time being. This kept solenoid from being cut off. Basically, the way the DDS3 works is, the boost solenoid wires are run in series thru the brain box, which contains a normally-open relay. If there is any trouble from the meth kit, it basically opens this relay, disconnecting power to the boost solenoid and bringing you to wastegate pressure

Okay, next item...here is a wire that provides the 0-5V signal I was talkin about earlier. I was originally going to install it with the XEDE until I realized that all the analogs where taken up. But here is a nice shot of the wire with the XEDE style pin installed. If you have a different EMS, this will not pertain to you

A close up...

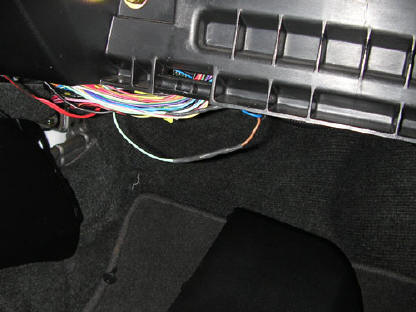
Okay, this is where I tapped into the park light for the dimming of the DDS3 monitor when you turn the lights on. It is on the drivers left foot floor board, right underneath the fuse box area...

Now...onto the wire harness of the flow sensor itself. Like everything else, I'm a fanatic of quick disconnects. Here I am splicing a 4-wire disconnect to separate the sensor from the brain box underneath the car

The female connector...

The male connector...

The 4 wires of the flow sensor with the terminals that insert into the connector
Step 1...

Step 2...cleaned up with heat shrink tubing

Just a shot of the other end...repeat of the previous process
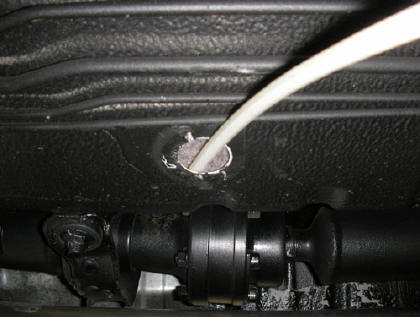
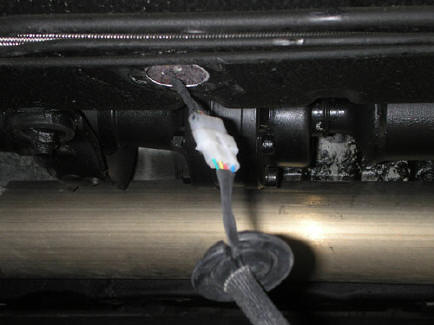
This is the hole underneath the car that I went thru. It is a rubber grommet that just pops out. It's roughly underneath the drivers seat

Using a large zip tie as a snake, this is where it pops out at inside the car

This is the end fed from the brain box...at this point in the install, I haven't installed the braided line with the flow sensor yet, so we will connect this to the other end shortly...

This is part of the install of the steel line. This is the section that goes up behind the engine and toward the nozzle in the intercooler line, this pic is facing toward the front of the car

This pic is facing toward the front of the car as well, but slightly further back

I brought all the slack in the line toward the rear of the car so that ended up putting the sensor box near the gas tank but right before the rear wheel well on the drivers side of the car

Here I had to route the line up above the suspension components to get them out of the way

This is where it enters the trunk area. This angle is weird I know. But I am laying flat on my back with my head under the car and my feet out of the car on the drivers side. This hole/grommet is directly under the position of the meth tank we installed earlier

Here you see the braided line hooked up to the pump and you can see how I looped the excess underneath the tank

Upholstery back in
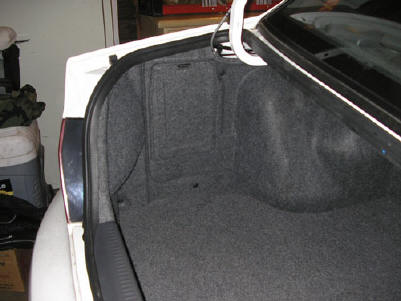
Hey...where did it go? No one will ever know...hahaha (Dr. Evil laugh)
Okay, back to the 4-wire connector of the flow sensor. I made sure to route the wire in a way to get it to the other end, but keep it out of the way. I used more of that sheathing on this part of the wire because it is exposed to the elements. To get it to fit in the middle of the grommet, I just made a slice

Installed under the car and complete

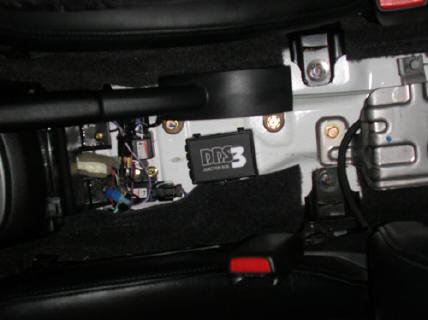
Here are some pics of the brain box actually wired up

A close up
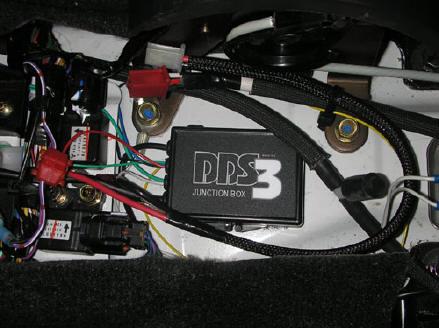
Finished product...

I put a zip tie around it because the lid felt a little like it would stay shut very securely. With all the wires connected inside it was a little stuffed and felt like the lid would pop of while underneath the console. This just ensured it didn't open up inadvertently

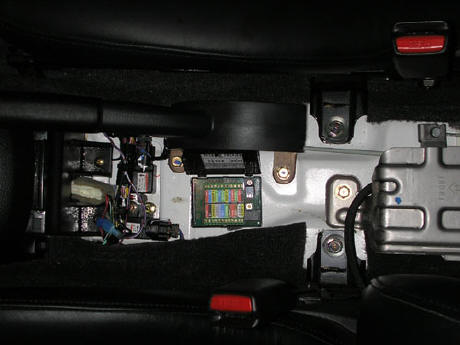
Just a pic of the connection of the console and the rest of the setup

Finished install...

Another close up. Oh, by the way, I have an outlet installed in my center console and what you see is just a outlet plug cover. It comes in very handy for connecting the laptop since I don't have a cig lighter. It has all kinds of uses...but that's another project, lol

Here is the gauge pod housing what I needed. Just a word on the top gauge. It is no longer there. It was a water pressure gauge but it was more trouble than it was worth and didn't really tell me anything I cared about. What is not seen in this pic is a small LED on the left side of the Aquamist gauge which is the extension of the SMC LED warning me when the level gets low

AHHHH, finally putting some methanol in it...
Okay, now to the actual usage and setup...it was actually very easy. I had some problems at first but what I noticed was that although the instructions say the pressure gauge is set from the factory at 10psi..it was more like 20, so I couldn't get the meth to flow right. But that was after racking my brain why it wasn't workin for some time. To start the setup I set the WL all the way counter-clockwise and the WH to all the way clockwise. This basically gave the full window of flow. Once this is set, I had to set the pressure switch to come on roughly the same psi that the progressive controller was set to initiate spray (14psi). The only way I was able to do this was while driving under boost. This is why I said it was good to have it installed in the console. I just lifted the console up, and had my flat tip screw driver to adjust the set screw down handy. What was happening at first was, since the pressure switch was set somewhere at 20psi and I was actually beginning injection at 14psi, the DDS3 thought it was a overflow condition and kept cutting me to wastegate pressure, so after figuring out what was goin on, I was excited to know that it was actually just doing what it was intended to do. So while driving, under boost, I just kept turning it down until I could get the DDS3 to not shut the system down. It worked like a charm. The next step in setup was to get the range of the flow right. To do this I just adjusted the SC pot until I could get full spray (at 21psi) to show up on the bars but still leave about 2 bars open...basically, when the system injects the meth, the flow is graphically displayed as bars of LEDs. You want to set it so that it will light up all but about 2 under normal conditions. Finally, after that was setup, I began my adjustment of the WL (low flow) and WH (high flow) settings. I began with WL, I would just keep turning it bit by bit while boosting until the system would shut down, then back it off a pinch. The same tactic worked for the WH setting.
After I had the system installed I had Shiv tune the car with the methanol. I've been using this setup for about 3 months now. I can say that the need for the system to be shut down has never come up, but I will say that I definitely have a peace-of-mind I didn't have before. And it looks great too!
Anyway, I hope this didn't confuse you guys too much. This was a lot of trial and error and I went a little above what might really have been necessary with the install, but I just like to do it right. There is some tailoring needed for most installs I believe but it's well worth it in the end. Please feel free to contact me should you have any questions.
__________________
Oh well, had to do the myspace thing...
http://www.myspace.com/63213968
Stunt biker or just a rider? Check out our website:
www.SBFreaks.com
July 2, 2006...Sac 2 The Bay Ride...don't miss it!